
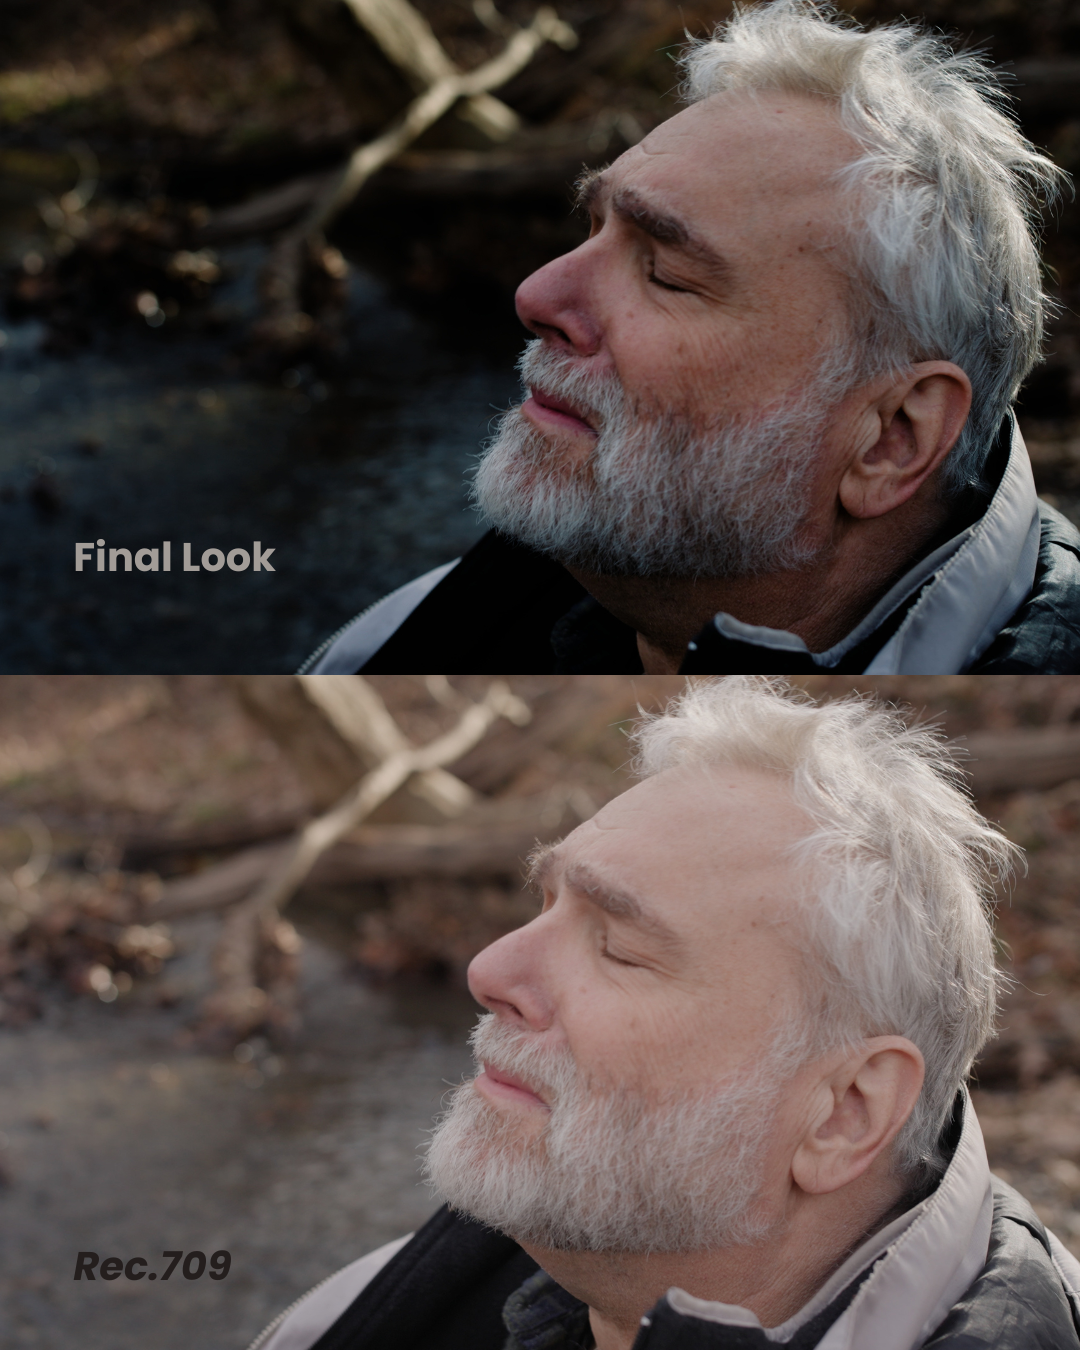
 Image 1 of 3
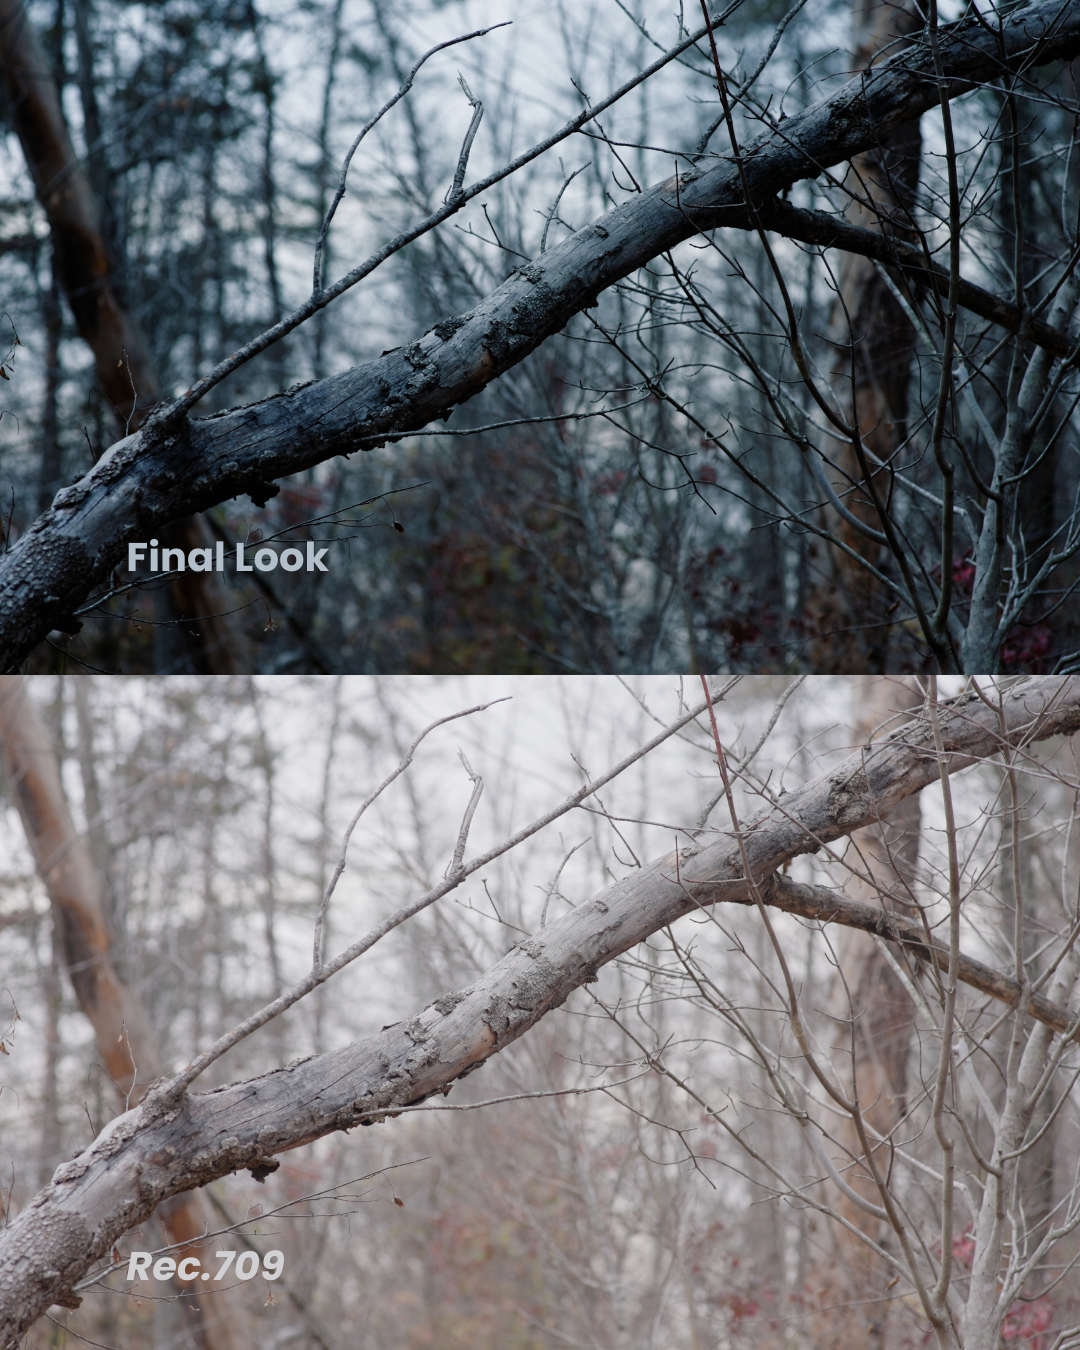 Image 2 of 3
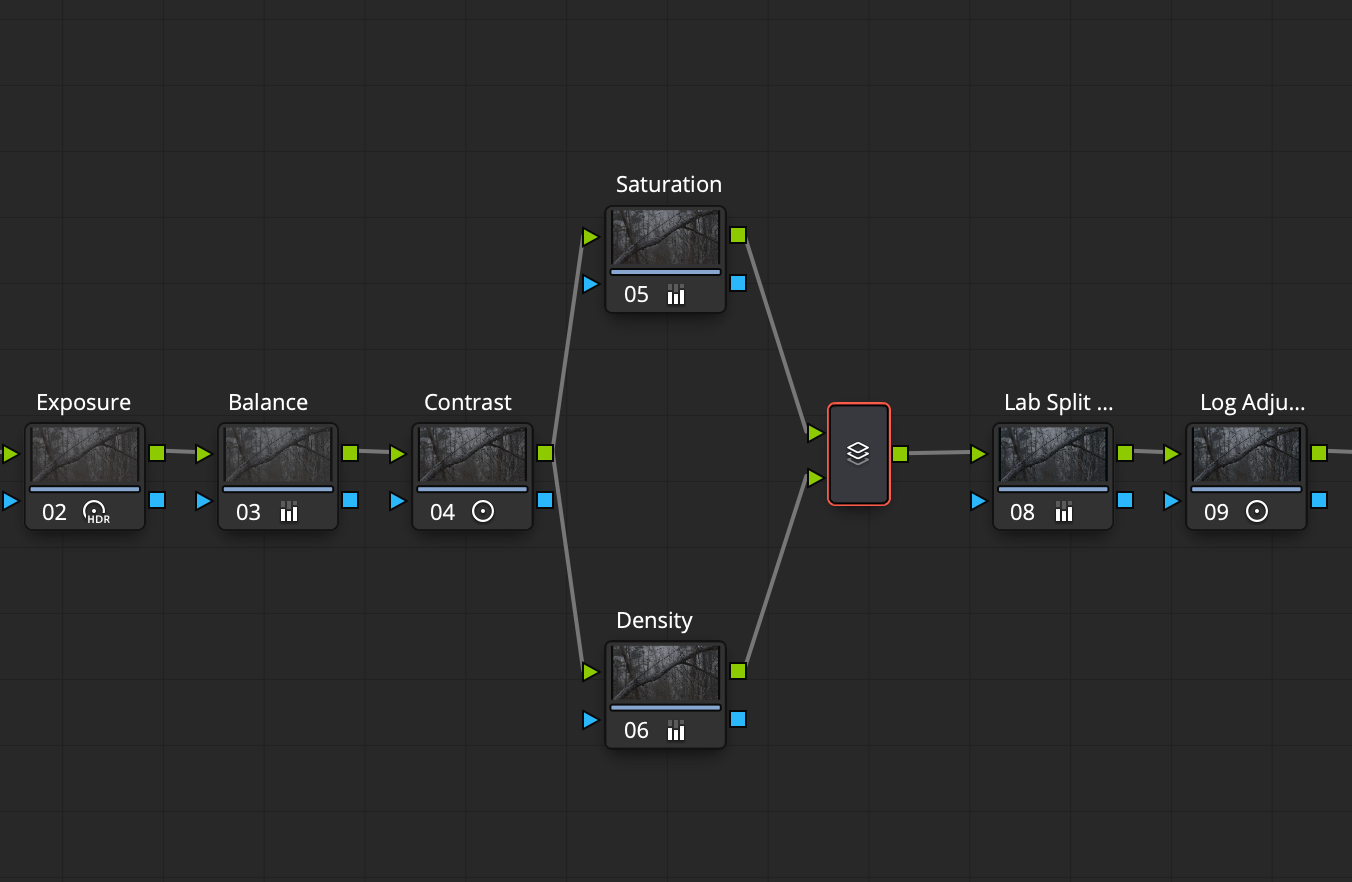 Image 3 of 3
Unlock a clean, filmic foundation for your footage without needing third-party DCTLs, complex plugins, or paid Studio FX.
This free DaVinci Resolve PowerGrade is designed around an efficient 7-node workflow that leverages different color spaces (Linear, HSV, LAB) within Resolve's native tools. By separating key elements, like white balance in Linear space, saturation and density via HSV isolation, and split-toning in CIE LAB. you get clean, precise image control that works seamlessly across various camera systems.
The PowerGrade (.drx file): Fully non-destructive, customizable 7-node setup.
Complete PDF Setup Guide: Step-by-step breakdown explaining the math, color spaces, and pivot points used in each node.
100% Free & Native: Works completely in the free version of DaVinci Resolve.
Photometric Exposure & Balance: Uses HDR EV stops and Linear Gain to scale light and adjust white balance accurately.
Isolated HSV Saturation & Density: Adjust color richness and exposure levels independently without color bleed.
Clean LAB Split-Toning: Add filmic color contrast without altering your underlying exposure curve.
Precise Log Shadow Control: Easily pull unwanted color casts out of deep shadows.
Flexible Color Management: Designed to fit into both wide-gamut workflows (DWG, ARRI) and camera-native Rec.709 pipelines.
Open DaVinci Resolve and navigate to the Color Page.
Open the Gallery tab (top-left corner).
In the left panel, click on PowerGrades (or create a new PowerGrade album).
Right-click inside the blank space of the Gallery window and select Import...
Locate and select the .drx file (make sure your file browser is set to show .drx files).
Drag and drop the imported PowerGrade directly onto your clip’s node graph!
PLEASE NOTE:
This PowerGrade is a structured node template, not a "one-click" LUT or instant look preset. Applying it will not automatically transform your image on its own. Instead, all color spaces, channels, and node architectures are pre-configured so you can immediately dive in and make precise adjustments to your footage.
Before making Contrast adjustments, you will need to set the Contrast Pivot Point to match your working color space (pivot values for all major color spaces are included in the guide) and configure your input/output CSTs for your camera setup.
Unlock a clean, filmic foundation for your footage without needing third-party DCTLs, complex plugins, or paid Studio FX.
This free DaVinci Resolve PowerGrade is designed around an efficient 7-node workflow that leverages different color spaces (Linear, HSV, LAB) within Resolve's native tools. By separating key elements, like white balance in Linear space, saturation and density via HSV isolation, and split-toning in CIE LAB. you get clean, precise image control that works seamlessly across various camera systems.
The PowerGrade (.drx file): Fully non-destructive, customizable 7-node setup.
Complete PDF Setup Guide: Step-by-step breakdown explaining the math, color spaces, and pivot points used in each node.
100% Free & Native: Works completely in the free version of DaVinci Resolve.
Photometric Exposure & Balance: Uses HDR EV stops and Linear Gain to scale light and adjust white balance accurately.
Isolated HSV Saturation & Density: Adjust color richness and exposure levels independently without color bleed.
Clean LAB Split-Toning: Add filmic color contrast without altering your underlying exposure curve.
Precise Log Shadow Control: Easily pull unwanted color casts out of deep shadows.
Flexible Color Management: Designed to fit into both wide-gamut workflows (DWG, ARRI) and camera-native Rec.709 pipelines.
Open DaVinci Resolve and navigate to the Color Page.
Open the Gallery tab (top-left corner).
In the left panel, click on PowerGrades (or create a new PowerGrade album).
Right-click inside the blank space of the Gallery window and select Import...
Locate and select the .drx file (make sure your file browser is set to show .drx files).
Drag and drop the imported PowerGrade directly onto your clip’s node graph!
PLEASE NOTE:
This PowerGrade is a structured node template, not a "one-click" LUT or instant look preset. Applying it will not automatically transform your image on its own. Instead, all color spaces, channels, and node architectures are pre-configured so you can immediately dive in and make precise adjustments to your footage.
Before making Contrast adjustments, you will need to set the Contrast Pivot Point to match your working color space (pivot values for all major color spaces are included in the guide) and configure your input/output CSTs for your camera setup.